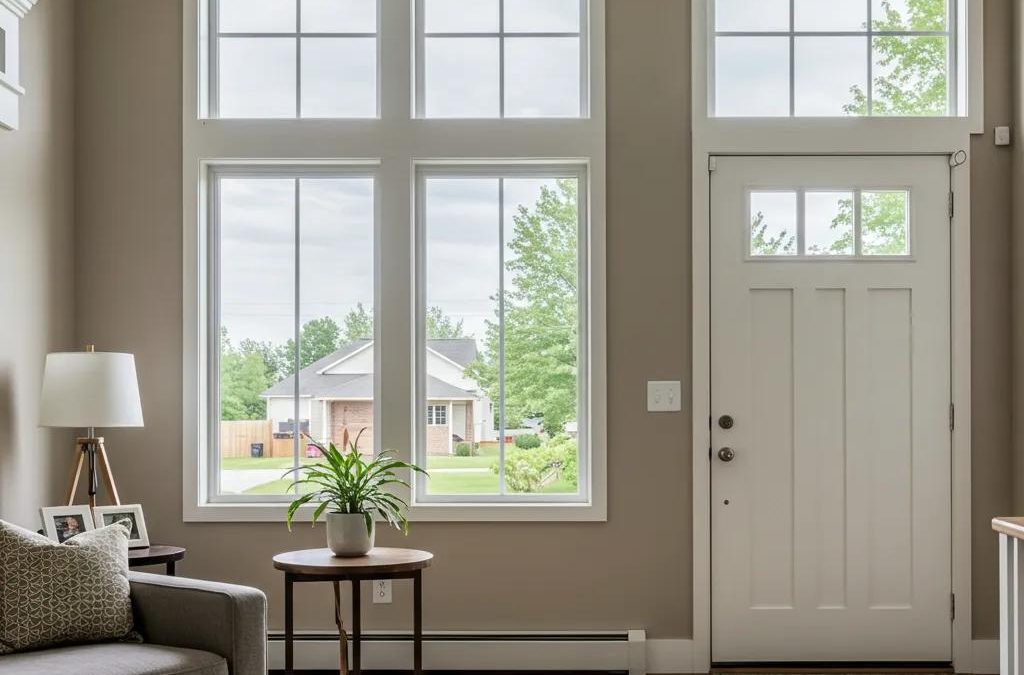
Your Guide to Getting Precise Window and Door Estimates for Your Home

Getting precise estimates for your window and door projects is key to avoiding unexpected costs, preventing delays, and ensuring your new installation performs exactly as you expect. This guide empowers homeowners like you with the knowledge to accurately measure openings, understand key cost factors, and confidently compare contractor quotes. We’ll walk you through clear measurement techniques, smart material choices, essential energy-efficiency metrics, and local cost considerations, all designed to help you secure a truly accurate estimate for your door and window project. You’ll discover step-by-step measurement instructions, the main influences on cost (materials, labor, permits, efficiency), a handy homeowner preparation checklist, and how to decipher a comprehensive estimate. Plus, we’ve included practical checklists, material comparison tables, and crucial questions to ask contractors. Our aim is to help you gather reliable, comparable bids, addressing common questions like ‘how do you measure a window for an accurate quote,’ ‘what should I ask for a window quote,’ and ‘measuring exterior doors for replacement.’

How to Measure Windows & Doors for Accurate Estimates

Homeowner measuring window dimensions with a tape measure and recording notes in a notebook, emphasizing accurate measurement techniques for window and door project estimates.

To get a truly accurate replacement estimate for your windows and doors, you’ll need to carefully record both the finished opening and rough opening dimensions. Don’t forget to note the depth and any potential obstructions, along with the current condition of the area. This detailed documentation allows installers to accurately price both labor and materials. Precise measurements are your best defense against costly reorders, frustrating custom fabrication delays, and miscalculated labor allowances, ensuring contractors have a clear understanding of the project scope. The ultimate benefit? A predictable quote that genuinely reflects the installation’s complexity and material requirements. Dive into the H3 sections below for precise, step-by-step instructions on measuring width, height, and depth, and learn how to steer clear of common mistakes that can inflate estimates or lead to unexpected change orders on site.

Your Step-by-Step Guide to Measuring Window Width and Height

When measuring window width and height, begin by clearly defining your reference points: the inside of the jamb (finished opening) and the rough opening, especially for full frame replacements. For width, take measurements in three spots—top, middle, and bottom—and always note the smallest value. Do the same for height, measuring left, center, and right, again recording the smallest number to account for any out-of-plumb conditions. If your replacement units need a specific pocket depth, measure from the interior trim to the exterior cladding. Finally, photograph each window with a ruler or tape measure clearly visible, labeling each photo with the room name and measurement values. This provides invaluable context for your contractor’s estimate.

Precisely Measuring Doors: Rough Openings and Frames

For doors, you’ll need to measure both the slab size and the rough opening: slab width and height, frame jamb-to-jamb dimensions, and rough opening width, height, and depth. For entry and patio doors, be sure to note the threshold height, swing clearance, and any necessary headroom. For sliding or multi-panel doors, record individual panel widths and track dimensions. When measuring rough openings, remember to factor in typical shim and clearance allowances installers require (usually 1/2″ to 3/4″ per side) so contractors can accurately quote any necessary frame adjustments. Taking photos of thresholds and surrounding trim is also a smart move, as it helps estimate potential rot repair or finish work that could impact labor costs.

Tools and Techniques for Achieving Precise Window and Door Measurements

Achieving truly accurate measurements hinges on using the right tools and consistent techniques. You’ll need a dependable steel tape measure, a laser distance measurer for larger openings, a level to verify plumb, and a notepad or smartphone for thorough photo documentation. Always measure twice, record three-point dimensions, and clearly annotate your photos with measurements. Use a carpenter’s level to identify any out-of-plumb conditions, which can often add to labor costs. If you’re ever uncertain about structural irregularities or wall depth, don’t hesitate to call for professional verification. This proactive step helps prevent under-quoting that could lead to expensive change orders down the line. Remember, clear documentation is the foundation for consistent and comparable bids from multiple contractors.

Avoiding Common Measurement Mistakes Homeowners Make

Common measurement errors often include measuring from the trim instead of the inside jambs, neglecting to record multiple width/height points, overlooking irregular sills or sloped openings, and failing to note existing damage or rot. These seemingly small oversights can lead to significant mismatches between ordered units and actual openings, resulting in costly rework and additional labor. To avoid these pitfalls, always photograph existing conditions, make notes on trim or exterior cladding thickness, and flag any visible structural issues for your contractor’s on-site assessment. Thorough and accurate initial documentation is crucial; it minimizes ambiguity and paves the way for more comparable and precise estimates.

Understanding the Key Factors Affecting Your Window and Door Installation Costs

When it comes to window and door installation or replacement, several key factors significantly influence the final cost: your material selection, the type of installation, local labor rates, desired energy-efficiency upgrades, and necessary permit requirements. Each of these elements impacts both the material and labor line items in a contractor’s estimate, and they often interact with specific local conditions, such as coastal building codes and contractor availability. By understanding these influences, you, as a homeowner, can confidently prioritize upgrades and establish realistic budget expectations. The following sections will delve into material comparisons, outline typical local labor ranges, explain how different styles affect costs, detail the pricing impact of energy efficiency, and summarize common permit considerations.

The Impact of Material Choices: Vinyl, Wood, and Fiberglass on Your Project Price

Your choice of material directly influences the unit price, overall lifespan, maintenance requirements, and how well it performs in humid coastal climates. Vinyl typically offers a lower upfront cost and minimal maintenance, though its durability can vary. Wood provides a premium aesthetic but comes with a higher price tag and ongoing maintenance needs. Fiberglass strikes a balance, offering excellent strength and stability, moderate pricing, and superior thermal performance in many environments. Here in coastal Florida, a material’s resistance to moisture and corrosion is paramount. Therefore, selecting options that demand less maintenance and stand up to salt-air degradation often delivers superior long-term value. Always choose materials that align with your performance goals, not just the initial price, to avoid costly premature replacements.

Before diving into the comparison table below, let’s highlight the key material attributes homeowners should carefully consider when evaluating estimates and assessing long-term value.

Material TypeTypical Price RangeDurability & Maintenance
VinylLow – ModerateLow maintenance; can be susceptible to warping in extreme heat
WoodModerate – HighOffers premium aesthetics; requires periodic finishing and protection from insects/moisture
FiberglassModerate – HighExcellent dimensional stability; low maintenance with strong thermal performance

This comparison clearly illustrates that while vinyl offers short-term cost-effectiveness, wood provides a premium look with higher maintenance, and fiberglass strikes an excellent balance of cost and longevity, especially well-suited for humid climates.

Understanding Typical Labor and Installation Costs in Southwest Florida

Labor and installation costs are directly influenced by local trade rates, the overall complexity of the job, and whether you’re opting for a simple insert replacement or a full-frame retrofit. Straightforward insert replacements generally demand less labor and fewer finish repairs. In contrast, full-frame replacements—especially those involving structural repairs, rot remediation, or custom trim—will naturally increase both labor hours and hourly charges. Factors like accessibility, the need for scaffolding, and multi-story work can also elevate total labor costs. Furthermore, permit-related inspections and any required wind-load upgrades specific to coastal codes will add to both labor and compliance expenses. To reliably compare estimates, always request itemized labor hours and detailed descriptions.

How Window and Door Styles Influence Your Final Estimate

The style of your windows and doors significantly impacts fabrication complexity, material usage, and installation time. While single- or double-hung windows typically come with standard cost profiles, options like casement, bay, bow, and custom-shaped windows demand additional framing and glazing complexity, which naturally increases the price. Doors range from standard slab replacements to elaborate multi-panel patio systems and custom entry doors complete with sidelights and transoms. Each of these adds to the cost through larger units, specialized hardware, and intricate finish work. Custom sizes and nonstandard shapes often come with longer lead times and premium pricing, so it’s wise to factor your style choices into early estimates to prevent any unexpected surprises.

The Impact of Energy Efficiency on Window and Door Pricing

While upgrades such as Low-E coatings, argon or krypton gas fills, double- or triple-pane glazing, insulated frames, and certified U-factor and SHGC ratings do increase the upfront cost, they significantly reduce your annual energy consumption. In warm, humid climates like ours, the focus often shifts to superior solar heat gain control and a low U-factor for optimal indoor comfort. ENERGY STAR and NFRC labels are invaluable tools for comparing performance across different products. Although cost recovery timelines vary, they are typically multi-year. For many homeowners, the enhanced comfort, reduced HVAC cycling, and potential eligibility for insurance discounts or rebates more than justify the investment in premium glazing. Always request NFRC labels and detailed performance specifications in your estimates to compare true energy value, not just marketing claims.

Government mandates and industry standards are increasingly driving the focus on energy efficiency for all building products.

Energy Efficient Door Design: Meeting Building Code Standards

ABSTRACT: AbstractIt is important to strive for greater energy efficiency when producing a product that will have a significant effect on a household’s overall energy consumption. The door manufacturing industry has been mandated by the Canadian federal government to authenticate that each product that they sell has a U-value no greater than 2.00 W/m2K. This regulation has caused door producers to re-evaluate their designs and certify only their most efficient designs before the enforcement date of January 1st, 2010. Currently only 11 solid wood exterior door designs offered by 2 manufacturers are listed under the CSA directory of certified exterior doors (CSA, 2009).
The purpose of this study is to determine the necessary features that a pre-hung door system is required to have in order to comply with the new building code. As it stands, solid wood doors will need to be built to a minimum thickness of 2-1/4”; use foam insulated cores; and / or incorporate the use of large sections of insulated

This study discusses the mandate for energy efficiency in door manufacturing, specifically mentioning a U-value limit and the implications for solid wood doors.

Navigating Permits and Local Regulations: Their Role in Project Costs

Permits and strict code compliance can introduce both fixed fees and potential scope changes, especially when upgrades trigger building code reviews or specific wind-load requirements in coastal regions. Permit fees vary significantly by county and project scope, and inspections might even necessitate rework if initial conditions don’t meet code thresholds. Contractors may either incorporate permit handling and inspection fees directly into their estimates or list them as separate line items—it’s crucial to confirm who is responsible during the quoting process. Gaining an early understanding of local regulations is key to preventing unexpected cost additions down the line and keeping your project timeline predictable.

Your Guide to Preparing for a Smooth and Accurate Window and Door Estimate

Thorough preparation is your best strategy to ensure your estimate accurately reflects the work truly required and helps contractors provide clear, ‘apples-to-apples’ pricing. Before scheduling any estimates, gather photos, your current measurements, detailed notes on existing conditions, your preferences for materials and finishes, and any relevant access details. This proactive approach significantly reduces measurement errors, encourages contractors to provide detailed itemization, and streamlines the on-site review process. The H3 subsections below offer practical pre-measurement checklist items, essential site-preparation actions, crucial questions to ask contractors, and what to meticulously check in an estimate for complete accuracy.

Your Essential Pre-Measurement Checklist: What to Include

Your pre-measurement checklist should be comprehensive, including clearly labeled photos of every opening, notes on existing unit types and any visible damage, details about interior and exterior trim, your preferred materials and approximate budget, and any potential access challenges (like stairs or narrow driveways). Be sure to document room names with each photo and record the three-point measurements you’ve taken, which you can then compare with your contractor’s measurements. Also, make a note of your desired timeline constraints and any historical issues (such as leaks or drafts) that might impact the project scope. Gathering all this information beforehand not only reduces on-site time but also empowers multiple contractors to provide truly comparable bids.

Preparing Your Home: Clearing the Installation Site

To ensure a smooth installation, prepare your designated areas by carefully removing furniture and any fragile items. Trim back landscaping that might obstruct exterior access, ensure there’s clear parking available for the crew, and secure any pets. Inside, protect your floors with drop cloths and move all window treatments out of the way. Have electricity and water access readily available if requested. Designate a contact person and provide clear instructions regarding alarm systems or any special handling required for antique windows or historic finishes. This proper site preparation is crucial; it significantly reduces daily labor time and helps prevent unexpected delays during the installation process.

Key Questions to Ask Your Contractor for a Detailed Quote

  • Intro: This essential checklist provides critical questions to ensure your quotes are comprehensive and truly comparable.
  1. What specific brand and model of window or door is being quoted, and can I review the NFRC label?
  2. Does this price cover an insert replacement or a full-frame replacement, and what specific conditions would necessitate a full-frame replacement?
  3. Who will be responsible for securing all necessary permits, scheduling inspections, and covering the associated fees?
  4. What comprehensive warranty covers both the materials and the labor, and what is the process for handling any claims?

Summary: By asking these specific, prioritized questions, you empower contractors to provide transparent, itemized estimates that effectively reduce hidden costs and enable confident, side-by-side comparisons.

Ensuring Accuracy: What to Look for in Your Window and Door Estimate

A truly comprehensive estimate will clearly list precise measurements, the specific material brand, model, and specifications, detailed glazing performance (U-factor, SHGC), a thorough labor breakdown (including hours and type), permit fees, disposal costs, and key timeline milestones. Be wary of vague line items such as ‘labor and materials’ without specifics, missing allowances for potential rot repair, or absent warranty language. Always confirm any exclusions, like painting or interior trim work, and inquire about contingency allowances for unforeseen hidden conditions. It’s always wise to obtain multiple written bids and diligently use your checklist to verify consistency across all proposals.

Your Comprehensive Door and Window Estimate Checklist

A comprehensive estimate checklist is your assurance that you’ll receive detailed proposals covering every aspect: measurements, materials, labor, permits, warranties, and clear timeline expectations. These are the essential elements that prevent unwelcome surprises and enable accurate, confident budget comparisons. Use this checklist to meticulously verify that each bid encompasses the exact same scope items and to proactively identify any hidden contingencies. Below, you’ll find the crucial line items and an example extract, modeled as a homeowner-friendly template, that you should expect from a professional contractor.

Verifying Measurements, Materials, and Labor Details

Carefully verify that your contractor’s measurements align with your own recorded three-point dimensions and labeled photos; always request that these measurements be explicitly included in the written proposal. Confirm all material specifications, including frame material, glass type, spacer, and Low-E coating, and ask for NFRC data where applicable. Labor details should clearly specify whether the price is for an insert or full-frame replacement, the number of installers, estimated hours, and any anticipated finish carpentry. If you find that measurements or specifications differ significantly from your records, don’t hesitate to ask the contractor for a clear explanation of the variance and to adjust the estimate accordingly.

Example Build Rite Builders estimate extract (template-style) illustrating typical line items homeowners should see:

Estimate ItemWhat to CheckWhy It Matters
Measurements & Site VerificationConfirm recorded width, height, depth, and supporting photosEnsures ordered units fit perfectly, avoiding costly reorders
Materials (Frame, Sash, Glazing)Brand, model, U-factor, Low-E specificationsClearly defines performance and cost differences
Labor & InstallationInsert vs. full-frame, estimated hours, crew sizeCrucial for accurate labor costs and timeline predictability
Permits & InspectionsWho files, estimated fees, and inspection schedulePrevents unexpected municipal charges and delays
Contingency / Rot RepairAllowance amount and specified hourly rateSafeguards against costly, late-stage change orders

This template demonstrates the crucial level of detail that truly protects homeowners from ambiguous bids and empowers them to make clear, ‘apples-to-apples’ comparisons.

Considering Your Energy Efficiency Options
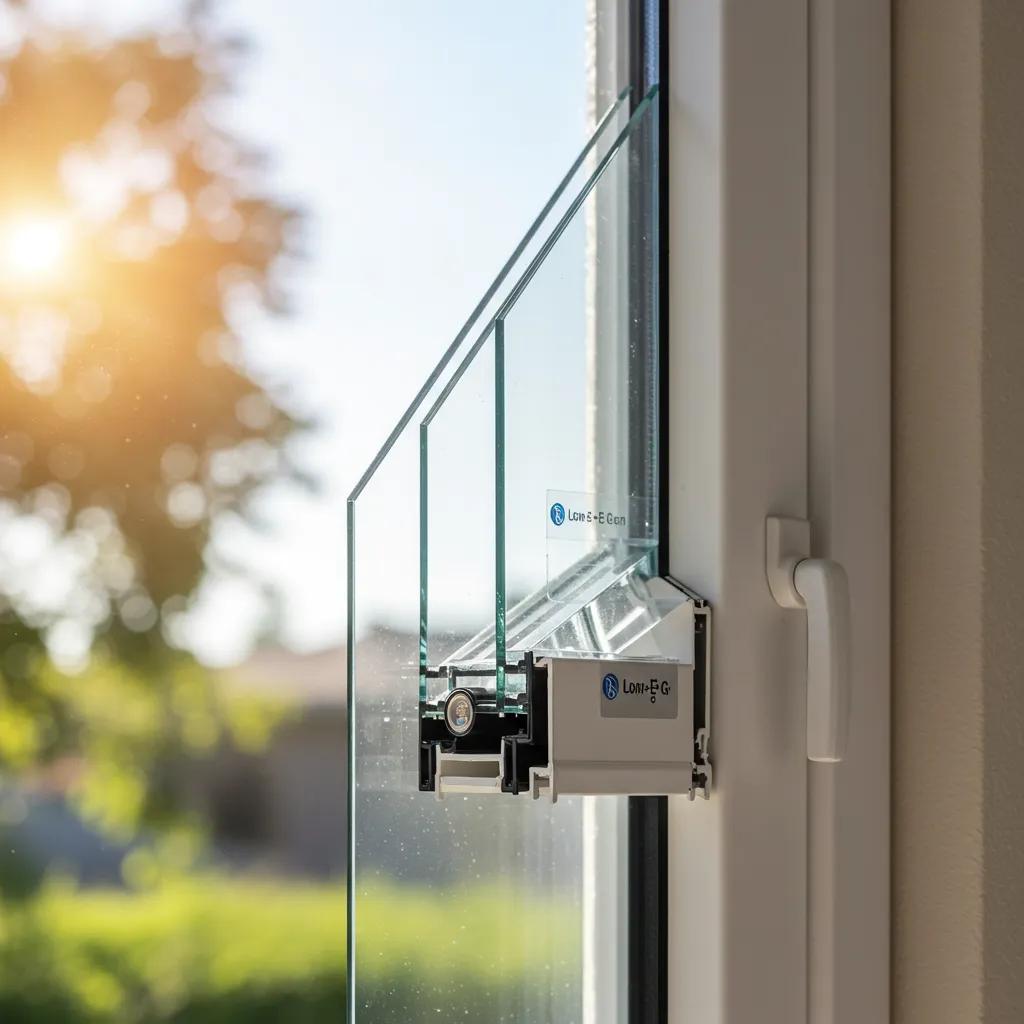
Close-up of energy-efficient window showcasing Low-E coatings, argon gas fills, and double-pane glazing, with sunlight illuminating the glass and frame features.

When planning your project, carefully consider options like Low-E coatings, argon gas fills, double-pane versus triple-pane glazing, warm-edge spacers, and frame insulation, all of which significantly impact energy performance and initial cost. Always review NFRC labels for U-factor and SHGC to ensure the performance aligns with Florida’s climate, where limiting solar heat gain is paramount. For most Southwest Florida projects, we recommend prioritizing coatings and frame thermal breaks that effectively reduce cooling loads. Evaluate the upfront investment against your expected energy savings and enhanced comfort to determine which upgrades offer the best long-term value for your home.

Confirming Warranty, Permits, and Timeline Details

Always confirm who is responsible for securing permits and paying associated fees, the anticipated number of inspections, and how any inspection findings will be addressed within the project price. Request written warranty terms that clearly cover both materials and installer workmanship, noting the duration and any conditions that might void coverage. Your timeline information should explicitly list the start date, estimated completion, and key milestone triggers for payments. Clear, unambiguous language regarding warranties, permits, and timelines is essential; it significantly reduces potential disputes and ensures aligned expectations for post-installation follow-up and any necessary corrective work.

For homeowners who appreciate expert assistance beyond DIY measurements and comparisons, Build Rite Builders proudly offers a comprehensive pre-measurement checklist and a complimentary consultation. This service is designed to validate your measurements and help you review material choices through our specialized Windows and Doors installation and replacement service. Our dedicated support ensures your measurements are precise, material selections perfectly match local performance needs, and that your estimates truly reflect the full scope of work.

  1. Pre-measurement Verification: Build Rite Builders meticulously cross-checks your homeowner measurements with our expert on-site verification.
  2. Material Review: Our experienced team carefully reviews and recommends suitable materials for optimal durability and energy efficiency in our local conditions.
  3. Estimate Validation: A complimentary consultation helps align your expectations and clarifies every line-item detail before your project begins.

Summary: Leveraging our professional validation services significantly reduces measurement errors, enhances estimate accuracy, and ensures your product choices perfectly align with your performance goals for optimal results.

Ready for a precise, no-obligation estimate? To have your measurements professionally verified and discuss your project, simply request your free on-site estimate from Build Rite Builders today for our expert Windows and Doors installation and replacement service.

Your Frequently Asked Questions

What if my measurements don't match the contractor's estimate?

If you find that your measurements differ from your contractor’s estimates, it’s crucial to address this discrepancy right away. Request a thorough explanation of their measurements and how they arrived at their figures. We also recommend double-checking your own measurements and providing any supporting documentation, such as photos. If needed, consider having an independent professional verify the measurements to ensure absolute accuracy. Open and clear communication is key to preventing misunderstandings and keeping your project smoothly on track.

How can I ensure my contractor is truly qualified and reliable?

To ensure your contractor is both qualified and reliable, begin by thoroughly checking their credentials, including all necessary licenses and insurance. Seek out reviews and testimonials from previous clients to understand their reputation and quality of work. Always ask for references and take the time to follow up with them to hear about their experiences firsthand. Furthermore, confirm that the contractor possesses specific experience with window and door installations. A truly reliable contractor will always be willing to provide a detailed written estimate and maintain transparency regarding their processes and project timelines.

What are the key benefits of choosing energy-efficient windows and doors?

Opting for energy-efficient windows and doors brings a wealth of benefits, including significantly reduced energy bills, enhanced indoor comfort, and increased home value. These products excel at maintaining a consistent indoor temperature by minimizing heat transfer, directly leading to lower heating and cooling costs. Many energy-efficient products also qualify for valuable tax credits or rebates, making them a financially savvy investment. Beyond personal savings, they contribute to a more sustainable environment by reducing overall energy consumption, making them an appealing choice for environmentally conscious homeowners.

How do I select the perfect style of windows and doors for my home?

Selecting the ideal style of windows and doors for your home requires a thoughtful balance of both aesthetic appeal and functional needs. Begin by carefully assessing your home’s architectural style and the overall design theme you envision. Consider crucial factors such as the amount of natural light you desire, your ventilation requirements, and energy efficiency goals. Additionally, reflect on the materials that will best suit your local climate and your maintenance preferences. Consulting with an experienced design professional or a trusted contractor can provide invaluable insights and guide you toward making truly informed decisions.

What's the typical timeline for window and door installation projects?

The timeline for window and door installation projects can vary significantly, depending on several factors such as the project’s scope, the number of units being replaced, and your contractor’s current schedule. Typically, a straightforward installation might take anywhere from a few days to a week. However, if structural repairs or custom orders are involved, the timeline could naturally extend. It’s always important to thoroughly discuss the expected timeline with your contractor during the quoting process to set realistic expectations and plan your project accordingly.

Are there specific maintenance tips for my new windows and doors?

Absolutely! Proper maintenance of your new windows and doors is paramount for ensuring their longevity and optimal performance. We recommend regularly cleaning the frames and glass with mild soap and water to prevent dirt and grime buildup. Periodically check seals and weather stripping for any signs of wear and replace them as needed to maintain peak energy efficiency. For wooden frames, periodic painting or staining will be necessary to protect against moisture and UV damage. Additionally, inspect hardware like locks and hinges for proper function and lubricate them to ensure smooth, effortless operation.

What should I do if I experience issues after installation?

Should you experience any issues after your installation, your first step should always be to contact your contractor directly to discuss your concerns. Most reputable contractors, like Build Rite Builders, will provide a comprehensive warranty or guarantee for their work and will be committed to addressing any problems. Be sure to document the issues thoroughly with photos and detailed notes to provide clear information. If, in a rare instance, the contractor is unresponsive or unwilling to help, review your contract for specific warranty details and consider seeking advice from a consumer protection agency or a legal professional if necessary.

Your Path to a Successful Project Starts Here

Securing accurate estimates for your window and door projects is absolutely essential for avoiding unexpected costs and guaranteeing a smooth, stress-free installation process. By diligently following the steps we’ve outlined for precise measurements and gaining a clear understanding of the factors that influence pricing, you, as a homeowner, can make truly informed decisions that perfectly align with your budget and performance needs. Take that crucial next step towards a successful home improvement project by utilizing our helpful pre-measurement checklist and consulting directly with our experienced experts. Request your free on-site estimate from Build Rite Builders today to ensure your project begins on the right track and finishes beautifully.